- Precision in Electrochemistry
- English
Introduction to Thales software
 icon on the desktop of laptop. The USB LED on the front panel of the potentiostat will turn from green to orange, indicating a successful establishment of communication between the laptop/computer and the potentiostat.
The ThalesXT window will show the start-up screen:
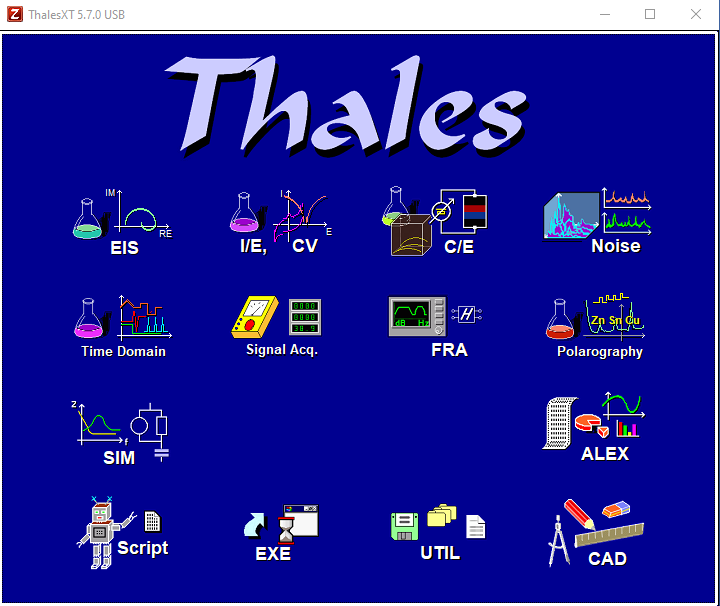
Classic mode
Thales-XT mode
3.1 ThalesXT mode
In the ThalesXT main menu, the user can
- Create, delete and edit Thales-Projects.
- Select desired application field.
- Select preferred techniques.
- Select the experimental method.
- Set the parameters for the selected method.
- Start a measurement with the selected method.
- Switch to Classic Mode.
- View the last result.
- Switch to Zahner Analysis software.
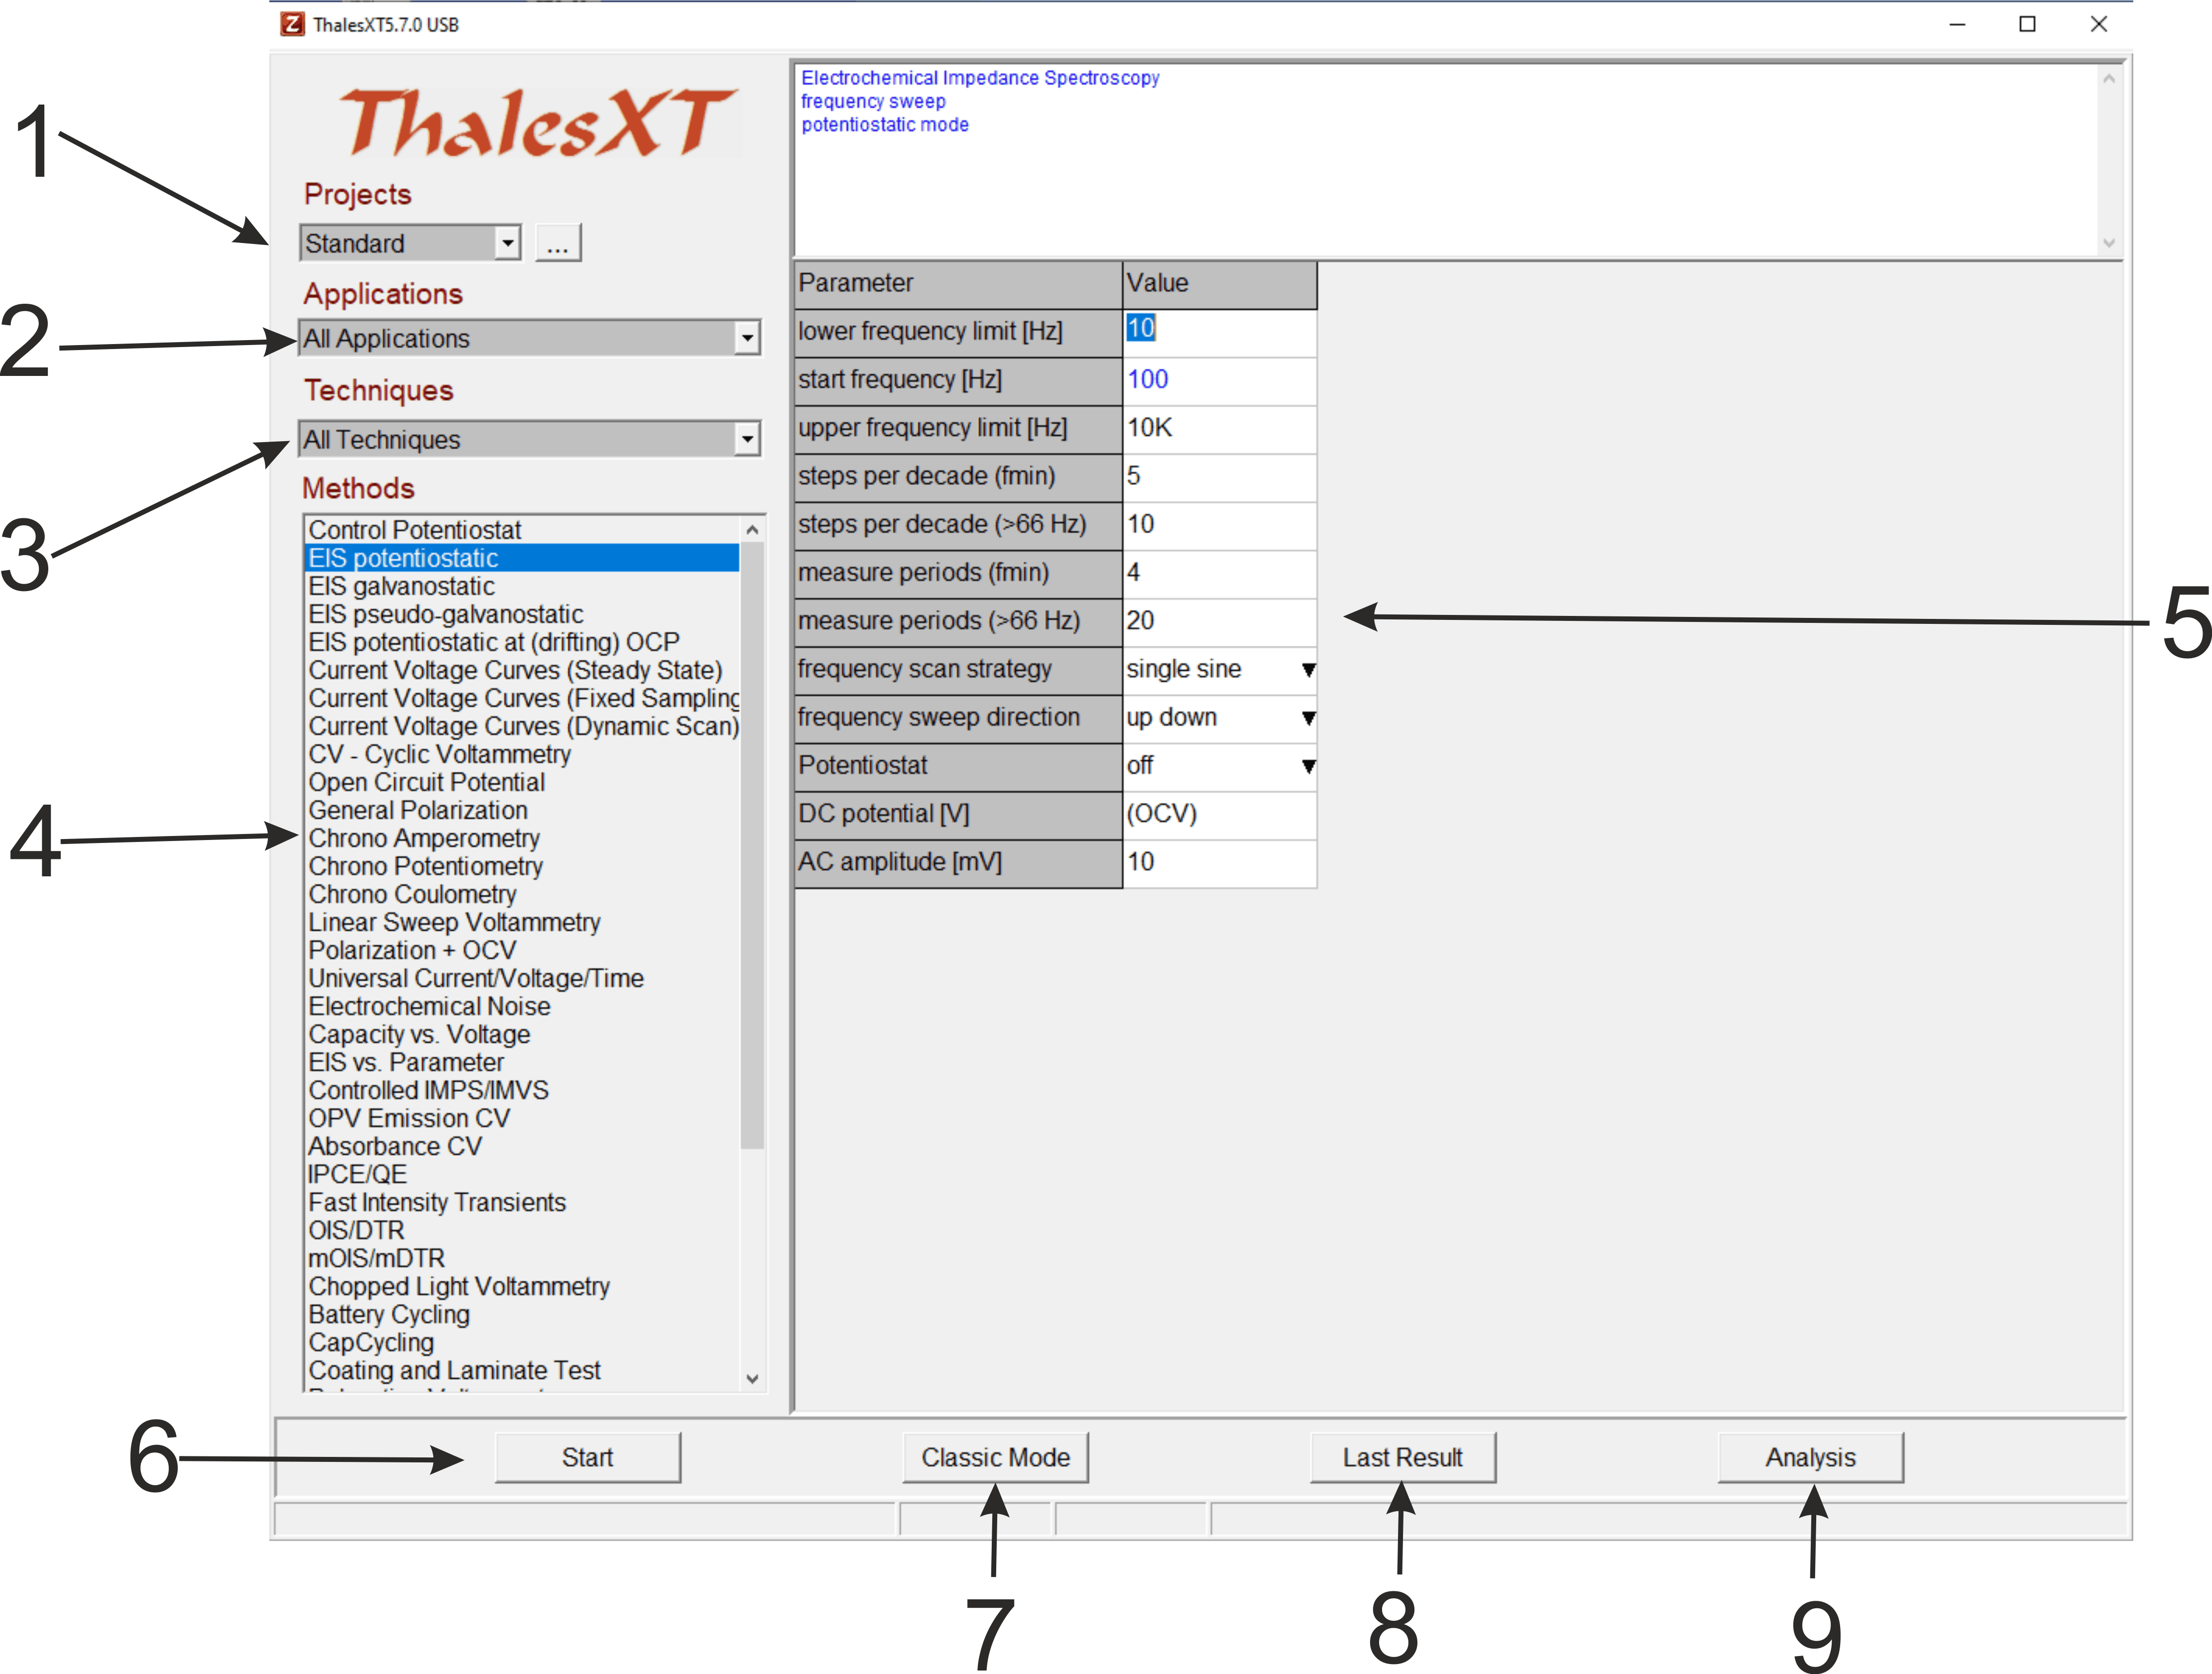
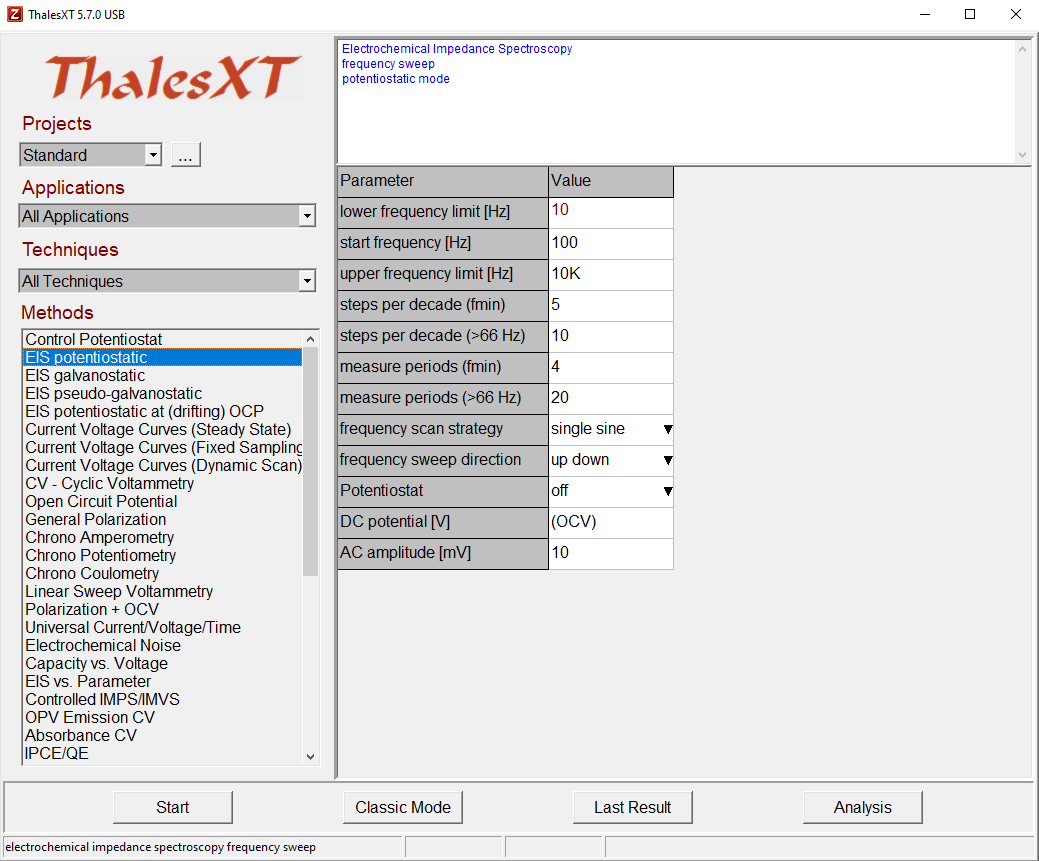
Projects
In Thales-Projects the user can handle his/her favorite methods and settings. The user is free to dedicate a Thales-Project to a person, to an application, to system-setup, a date, or do anything else. In a Thales-Project, a method with all its settings is saved.
Applications & Techniques
For selecting a method, ThalesXT provides two filters.
Applications filters all methods which normally are used in a certain application. If the user, for example, set the Applications filter to “Batteries”, under Methods only methods are listed which are relevant for battery research.
Techniques allow the user to select a category of methods such as AC-techniques, static DC-techniques, and dynamic DC-techniques.
Methods
From this menu, the preferred measurement method can be selected. If the user sets the “Application” filter to “All Applications” and the “Techniques” filter to “All Techniques” then all available methods will be shown in the “Methods” list.
Parameter List
On the right side of the selection area, the parameters of the selected method are listed for editing. The inputs can be provided either by entering a numerical value or by selecting one item from a pull-down list. When entering numerical values, all standard formats are allowed. If the user e.g. wants to enter a value of 0.01 then the user can enter 0.01 or enter 10m (10 milli) or 1e-2. When ENTER is pressed or the cursor is set to another parameter then the entered parameter is checked for consistency with the hardware and with related parameters. If the check is passed then the value is displayed in blue color. If an erroneous value is entered then the closest valid value is set instead.
Start
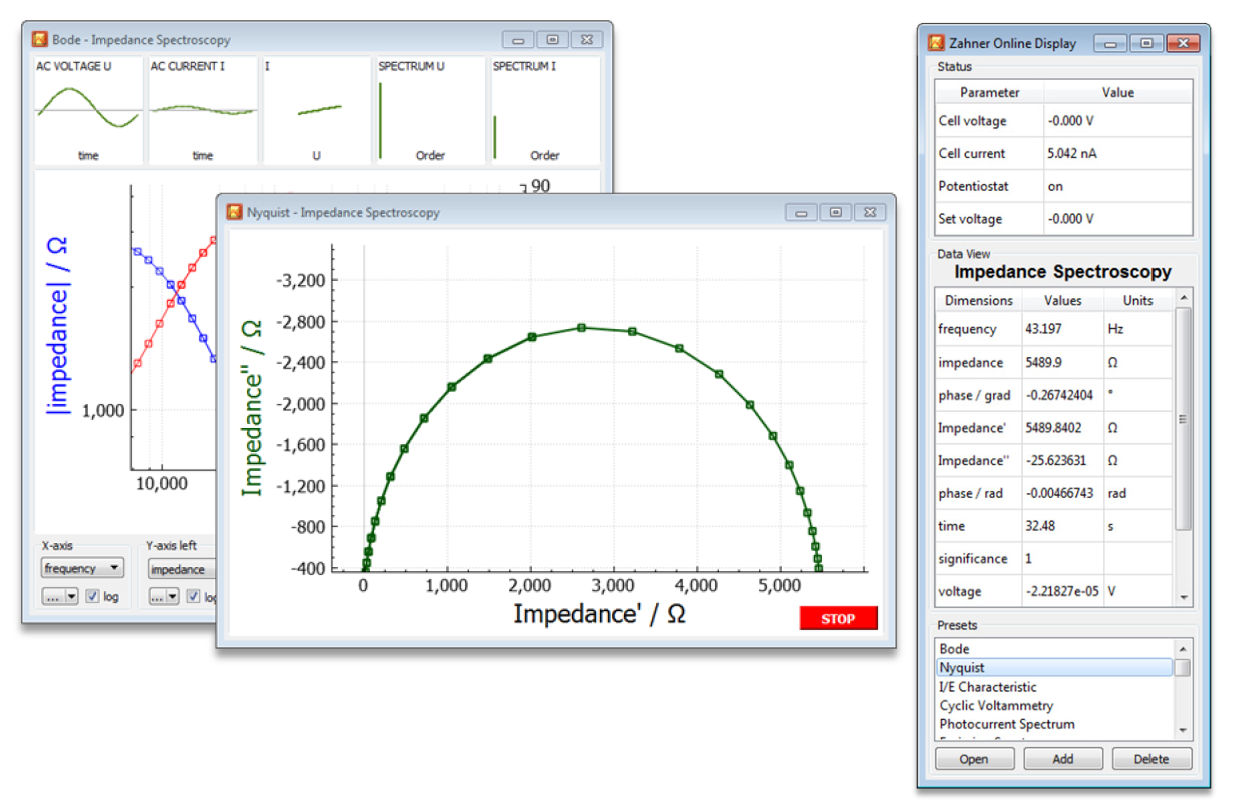
Clicking on the button “Start” starts the measurement of the selected method using the previously defined parameters. The dedicated acquisition windows will open where the user can watch the measurement progress. The example shows the EIS online windows.
Classic Mode
Not all methods and parameters can be accessed by the ThalesXT user-interface hence for advanced measurements Classic mode is needed. Classic mode gives access to more methods and in some cases more details. The user can access the Classic Mode by clicking on this button.
Last result
The user can look at the previous result by clicking on this button.
Analysis
The “Analysis” button starts the Zahner Analysis software.
3.2 Thales classic mode
In classic mode you will get the following main menu:
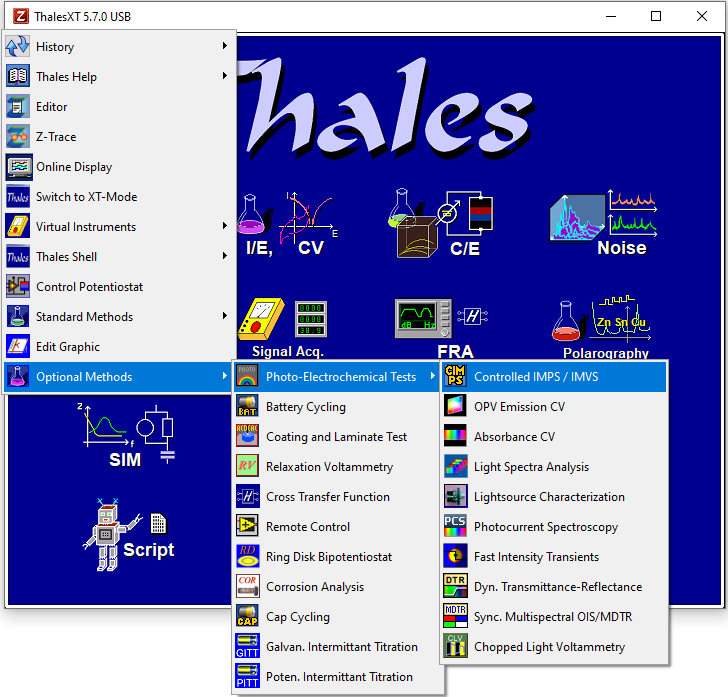
The following table provides an overview of the methods available in the Thales Classic mode. By hovering the mouse cursor on some icons in Thales software a sub-menu appears. Clicking on an icon will bring you to the parameter window of that experimental method.
| Main icon | Sub-menu icon | Program section |
|---|---|---|
 |
Potentiostat, galvanostatic and pseudo-galvanostatic EIS measurements. | |
 |  |
|
 |
| |
 |
Polarization measurements
| |
 | | |
 |  |
|
 |
| |
 |  |
|
 |
| |
 |  |
|
 |
| |
 |
| |
 |  |
|
 |
| |
 |
| |
 |
Polarography Methods
| |
 |
| |
 |
| |
 |
| |
 |
|